Heart-Stopping Cinnamon Rolls

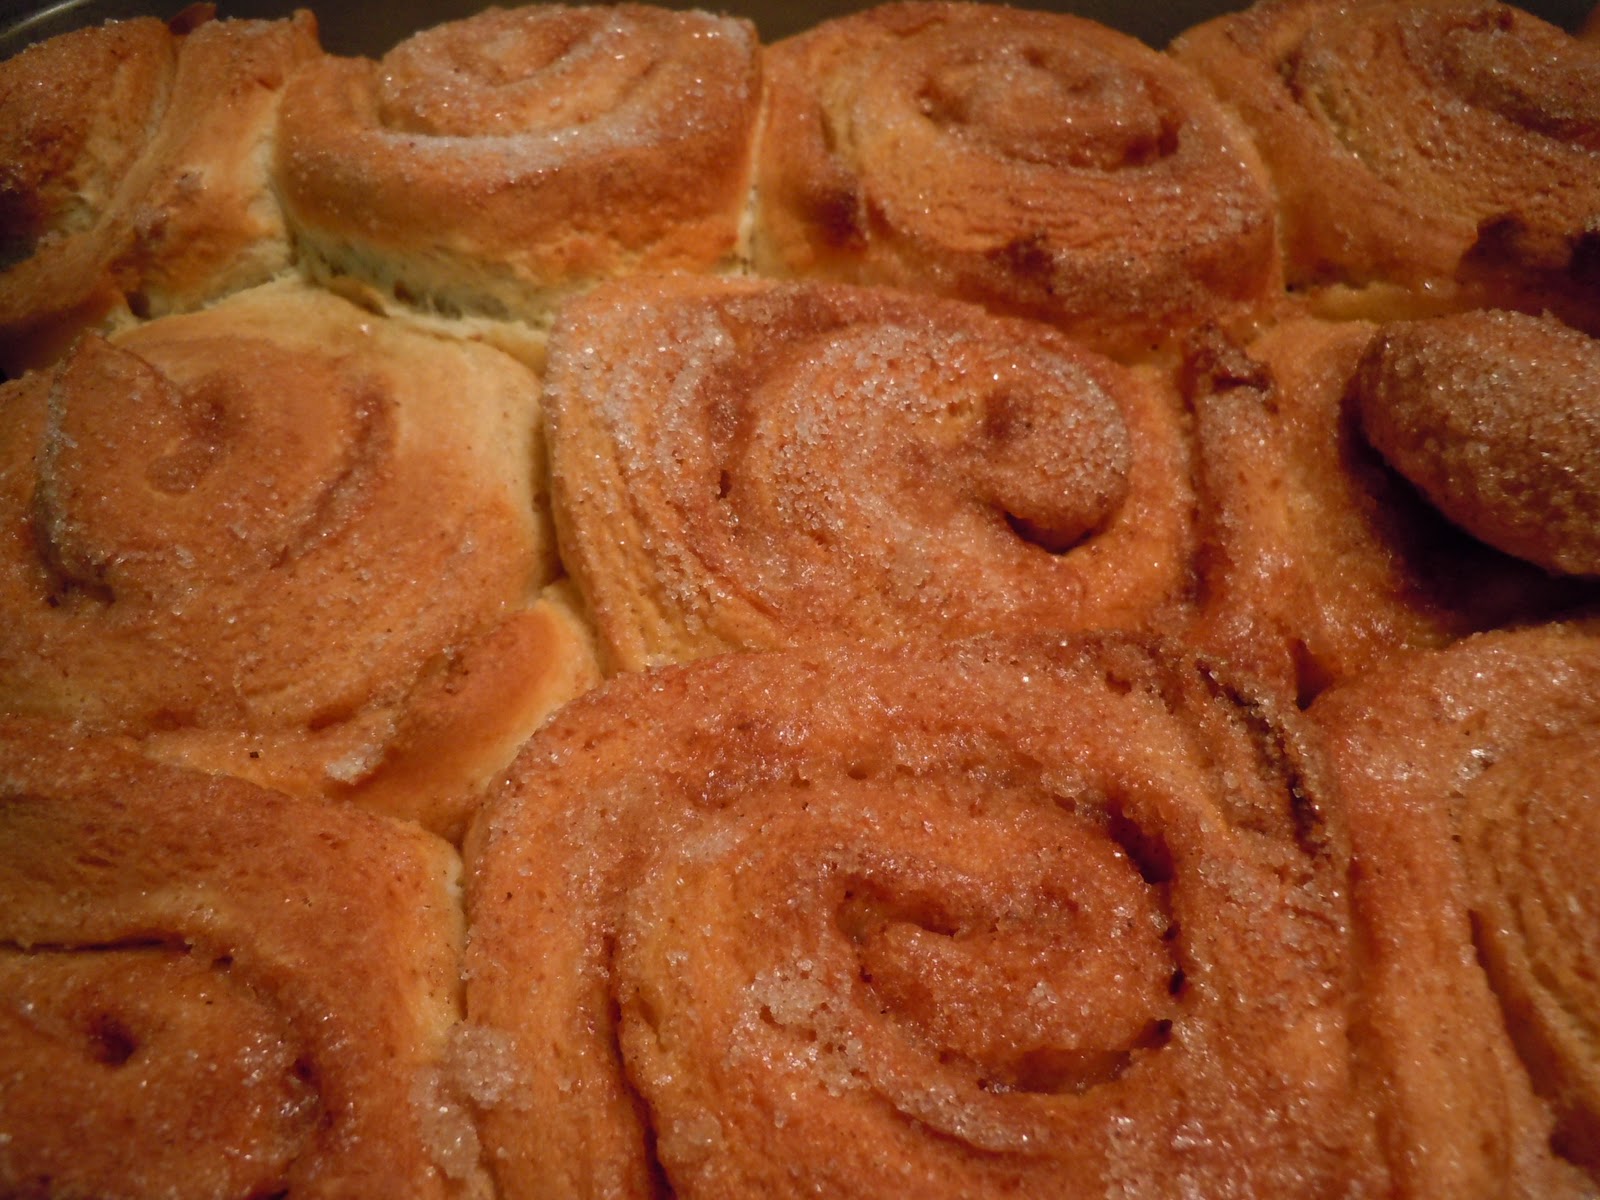
And that's the picture of these babies without the frosting. I just couldn't bring myself to take a picture of the completed item. It hurt my arteries too much. I mean, look at the sugar on those rolls. Go ahead, look again. That's all sugar. Well, that and a little cinnamon. Imagine what these things will do to you with frosting.
Which is to say that they'll be the most delicious things you've had in your life. You won't be able to eat more than one. Your body won't let you. There's a point at which your body can't handle any more sugar. You hit that point when you eat half of one of these. And then you keep going. Why? Because they're wonderful. Because they're tasty. Because they're everything that's good and right about waking up too early in the morning to make fresh cinnamon rolls.
Not that I did that. No way. These cinnamon rolls were a late evening snack. Being a yeast product, they require at least 3 hours of rising. Now, whoever wants to get up early enough to enjoy these things right out of the oven as a breakfast item is welcome to it. I, however, will be sleeping late and enjoying my cinnamon roll in the more sensible hours of the afternoon.
Paula Dean, in her infinite wisdom, provides this recipe. And it shows. There are about 2 1/2 sticks of butter in this recipe. At least. Thank you southern comfort.

Ingredients

Dough:
1/4-ounce package yeast (or 7 grams)
1/2 cup warm water
1/2 cup milk
1/4 cup sugar
1/3 cup butter
1 teaspoon salt
1 egg
3 1/2 to 4 cups all-purpose flour

Filling:
1/2 cup melted butter, plus more for pan
3/4 cup sugar, plus more for pan
4 tablespoons ground cinnamon
1 tablespoon ground nutmeg
3/4 cup raisins, walnuts, or pecans, optional

Glaze:
4 tablespoons butter
2 cups powdered sugar
1 teaspoon vanilla
3 to 6 tablespoons hot water
Directions

Heat oven to 350 degrees F.

In a small bowl, dissolve yeast in warm water and set aside. In a large bowl mix milk, sugar, melted butter, salt and egg. Add 2 cups of flour and mix until smooth. Add yeast mixture. Mix in remaining flour until dough is easy to handle. Knead dough on lightly floured surface for 5 to 10 minutes. Place in well-greased bowl, cover and let rise until doubled in size, usually 1 to 1 1/2 hours (mine took about 2).

When doubled in size, punch down dough. Roll out on a floured surface into a 15 by 9-inch rectangle. Spread melted butter all over dough. Mix sugar and cinnamon and sprinkle over buttered dough. Sprinkle with walnuts, pecans, or raisins if desired. Beginning at the 15-inch side, role up dough and pinch edge together to seal. Cut into 12 to 15 slices.

Coat the bottom of baking pan with butter and sprinkle with sugar. Place cinnamon roll slices close together in the pan and let rise until dough is doubled, about 45 minutes. Bake for about 30 minutes or until nicely browned.

Meanwhile, mix butter, powdered sugar, and vanilla. Add hot water 1 tablespoon at a time until the glaze reaches desired consistency. Spread over slightly cooled rolls.

Braised Cabbage

 
In the winter, there's nothing like cabbage. And there's a sentence I never thought I'd write. It must have been the many years in England that have made me come around to the vegetable. Like most people probably, I still have a bit of an aversion to the food on principle. Too many times overcooked and bland, cabbage has had a bad rap for the past generation or so. Only recently have chefs taken the poor humble cabbage and given it a face lift. 
I've been a fan of braising vegetables since my experimentations with leeks, so this recipe was intriguing. Just enough Indian and Asian spice to make the whole thing interesting, but still, the braising brought out the inherent sweetness to the cabbage that made it a delightful side dish for the winter. 
Oh cabbage, where have you been all my life?

Ingredients
1 1/2 pounds savoy cabbage
1/4 cup plus 1 tablespoon canola oil
2 whole cloves
1 tablespoon black mustard seeds (I used ground mustard, it worked just fine)
20 curry leaves (also relied on the powdered form here, no problems)
1 bay leaf
2 tablespoons finely chopped shallot
2 teaspoons finely chopped garlic
2 tablespoons peeled, julienned fresh ginger
1/2 tablespoon ground turmeric
1 to 2 tablespoons finely chopped seeded jalapeño pepper
1 cup chopped fresh or canned tomato
1 1/2 cups vegetable or chicken broth
Kosher salt.

Method
Cut cabbage into 6 to 8 wedges, with the widest part no more than 2 inches, leaving the core intact so the wedges stay together while cooking. Place a heavy skillet, large enough to hold wedges fairly snugly, over medium heat. Add 1/4 cup oil and heat until it shimmers. Add the cabbage, and cook, turning once, until browned on both sides, 2 to 3 minutes a side. Transfer to a plate, and set aside.

Reduce heat to medium-low, add remaining 1 tablespoon oil, and heat until it shimmers. Add cloves, mustard seeds, curry leaves, bay leaf, shallot and garlic, and cook, stirring, for 1 minute. Add ginger, turmeric, 1 tablespoon jalapeño, tomato and broth. Season with salt to taste. If desired, add more jalapeño to taste.

Increase heat to medium-high, and bring to a boil. Add cabbage, fitting it tightly together in the bottom of the pot. Cover, reduce heat to medium, and braise cabbage until tender, about 10 minutes, turning it once halfway through cooking. Remove and discard cloves, curry leaves and bay leaf. If desired, serve with rice.

Yield: 3 servings

Ricotta Cheese Gnocchi with Bacon and Sage

I have had a love/hate relationship with gnocchi since I first learned about it. I mean, first there's the name issue. How to pronounce it? I've heard enough variations from people who "swear" they're right, that if I can help it at all, I don't even say it anymore (and luckily, in blog format, I only have to write it.) Then there's the preparation. There also seems to be a bit of diverging opinions here about how gnocchi should be served: what kind of consistency and with what ingredients. It was all a bit too much to take in personally. But let's just say that the idea of how wonderful gnocchi can be has stayed with me througout this troubled time.

When I saw Bittman had developed not only a "no potato" version but also one that involved only ricotta cheese, I was intrigued. Perhaps here was finally a way for me to make it, avoiding all those long bitter debates. Who cares if you think the potatoes should be mashed for appropriate gnocchi preparation? This recipe doesn't even HAVE them!!

And so, I attempted this recipe, only realizing halfway through that, if gnocchi in and of itself was bad for you, this was a heart-stopping disaster. The "pasta" dough is made from an entire tub of ricotta cheese. Oh yes. Feel those arteries clogging. And if that wasn't enough, I felt the need to "spruce" the recipe up a bit by adding bacon on top. And it was delicious. Perhaps a once in a lifetime dish (hey, the arteries can only handle so much).

Ingredients

Salt
One 15-ounce container ricotta cheese, preferably whole milk
2 eggs, lightly beaten
1 1/4 cups freshly grated Parmesan, plus more for serving
Freshly ground black pepper
3/4 to 1 cup flour
3 tablespoons unsalted butter
10 or more sage leaves
Bacon (optional)

Method
Bring a large pot of water to a boil and salt it. Combine the ricotta, eggs and Parmesan in a large bowl, along with some salt and pepper. Add about 1/2 cup flour and stir; add more flour until the mixture forms a very sticky dough. Scoop up a spoonful of dough and boil it to make sure it will hold its shape; if it does not, stir in a bit more flour.

If you're using the bacon, fry it in a large skillet until crispy. Remove it with a slotted spoon to some paper towels until later. Put the butter in the skillet over medium heat. When it melts and turns a nutty brown color, add the sage. While it fries, drop the ricotta mixture by the rounded tablespoon into the boiling water, working in batches of six or so at a time so as not to overload the pot.

When the gnocchi rise to the surface, remove with a slotted spoon and transfer to the skillet. When all the gnocchi are done, toss, taste and adjust the seasoning, return the bacon to the skillet, and serve immediately.

Yield: 4 servings.

Potato Chip Tortilla

I've always been rather apathetic about the Spanish tortilla. For a national dish, it's always seemed rather, well, mundane. Just eggs, cheese, potatoes, and onion. Maybe a hint of spice. But that's it.
But I have underestimated the tortilla. In its simplicity, it has the soul-nourishing goodness of comfort food. Well, comfort food for Spanish people. And now that I've made one, I realize that it is yet another "deceptively" simple dish. Yes, it may just be a few ingredients, but the method of cooking will separate the weak from the strong. Literally. Try carrying the necessary cast-iron skillet from the stove to a hot broiler without burning yourself.
That's what I call culinary endurance.

Now, oddly enough, this recipe comes from my latest favorite recipe book, Around My French Table by Dorie Greenspan. I have no idea how this clearly Spanish recipe snuck in to the lot, but perhaps the sheer fact that the two countries share a border is enough for it to gain entry into a French cookbook. Greenspan is also the one who devised a clever, and dare I say "American" way of simplifying even this "simple" dish. Instead of spending your time peeling, boiling, and frying the potatoes to go into the tortilla, she uses potato chips. Seriously. Lays standard potato chips. I was intrigued when I read the recipe, particularly when she insisted that no one would ever notice the difference when they tasted it, but sure enough, the tortilla comes out looking like, well, a tortilla. Not a potato chip monstrosity.  Now, I'm not sure how the Spaniards will react to this development but it was good enough for me! Did I mention that I hate peeling potatoes? Oh, and the smashing of the potato chips is cathartic enough for anyone. And, well, just plain fun.

Ingredients
5 ounces potato chips (I used Lays sea salt potato chips)
5 eggs
1 onion, finely chopped
3 scallions, white and light green parts only, thinly sliced
1/4 cup minced parsley
1/4 cup minced cilantro
3 garlic cloves, finely chopped
1 tsp. cayenne
1 tsp. ancho chili powder
1 tsp. fennel seeds
1 tbsp. heavy cream
1/8 cup grated Gruyere cheese
1/8 cup grated pepper jack cheese (optional)

Method
Put the potato chips in a bowl, reach in, and crush the chips (I did mine in a plastic bag to avoid mess).

Pre-Crushed Chips

Post-Crushed Chips

Put the eggs, onions, scallions, herbs, garlic, and spices into another bowl. Season with salt and pepper and whisk to combine. Pour the eggs over the chips and stir to blend well.

You'll need a skillet that can fit under your broiler. Mine was an old cast-iron skillet about 10 inches (and was big enough to fit the recipe). Tis a thing of glory, but really, use whatever skillet that can fit comfortably in your oven. A nonstick sillet will also work. If you're not sure about the handle, wrap it in foil.

Skillet of glory

Position a rack under the broiler so that when you slide the skillet onto it, it will be about 6 inches from the heat source. Turn on your broiler.

Place the skillet over medium heat and pour in the olive oil. When the oil is hot, give the eggs and chips a last stir and pour them into the pan. Use a fork to push the mixture to the edges of the pan if necessary, then let the mixture cook. Cook roughly 5 minutes, or until it is set around the edges and the top is almost done (this is more art than science. Just keep an eye on the eggs). Remove the pan from the heat and run a spatula around the edges and under the tortilla in case it has stuck to the pan.

Slide the pan under the broiler and cook until the top of the tortilla is set, about 3 minutes. If you want to present this old-school, let the skillet cool down a bit and place a plate inverted on top of it. Then flip the skillet so that the bottom of the tortilla is now the top on the plate.

Serve warm or at room temperature.

Mushroom and Shallot Quiche

Right, another quiche recipe. Hey, I was on a pastry roll if you know what I mean (no pun intended). Anyway, this presented a nice change for the cheesey gorgonzola quiche. A little more savory and earthy, but just as delicious. I recommend using as many kinds of mushrooms as you can find (or want) for this one. I used a combination of white and shitake mushrooms, but I think you'll get even more flavor out of this deceptively simple dish.

Ingredients
1 1/2 tbsp. unsalted butter
3 shallots, finely chopped
Salt and freshly ground pepper
1/2 lb mushrooms (at least), trimmed, wiped clean, and cut into 1/4 inch slipes
2 tbsp. minced thyme (fresh or dry)
1 9- 9 1/2 inch tart shell made from Tart Dough, partially baked and cooled
3/4 cup heavy cream
2 large eggs
2 scallions, white and pale green parts only, thinly sliced
2 tbsp. finely grated Gruyere cheese

Method
(Tart Dough should already be made and partially baked)
Melt the butter in a large skilled, preferably one that's nonstick. Toss in the shallots, season with salt and pepper and cook over medium-low heat, stirring, until translucent, about 2 minutes. Add the mushrooms, season again with salt and pepper, turn the heat up to high, and cook, stirring, until they are softened and browned, 5 to 8 minutes. The mushrooms will first sop up all the liquid in the pan, then they'll exude it, then it will disappear. Sprinkle the mushrooms with 1 tbsp of thyme and cook for 30 seconds more, then turn the mushrooms into a bowl to cool for at least 15 minutes.

Center a rack in the over and preheat the oven to 350 degrees F. Put the crust on a baking sheet lined with a silicone mat or parchment paper.

Sprinkle the remaining tablespoon of thyme over the bottom of the crust. Spoon over the mushrooms, avoiding any liquid that has accumulated in the bowl. Lightly beat the cream and eggs just until well blended, season with salt and pepper, and pour over the mushrooms. Top the custard evenly with the sliced scallions and grated cheese.

Carefully slide the baking sheet into the oven and bake for 30 to 35 minutes, or until the custard is uniformly puffed (wait for center to puff), lightly golden, and set (mine took over 40 minutes). Transfer the quiche to a rack, remove the sides of the pan, and cool the quiche until it's only just warm or until it reaches room temperature before serving.