Whole Wheat Breadsticks

I can't help it. I love bread. I mean, I really love it. Save your pastry. Save your cakes. Give me a fresh-baked loaf of good ol' white bread any day and I'll be as happy as a clam. Of course,  in this Atkins "evils of carbohydrates" world in which we now live, my obsession is a sinful one. And while I usually take such doom and gloom of yeast and flour with a pinch of salt (ok, more than a pinch), I do find it hard to get up the gumption to make bread for myself very often.

Why?

Because it takes forever.

Literally. Forever.

In my perfect world, I would own a bread machine, crank it up at night, fall asleep, and awake to my very own loaf of bread, baked for me by the little elves of machinery.
Alas. This is not currently the case.

So when its raining cats and dogs outside and I find myself with very little else to do (or rather little else I want to be doing, such are the joys of procrastination), bread-making seems a good activity.

And, taking that into consideration with the above nutritional scare tactics about the evils of white bread, I took the latest NY Times "Recipes for Health" column and decided to try the joys (?) of whole wheat breadsticks.

To be honest, aside from the kneading (which I hate and loathe with the passion of a thousand suns), these were surprisingly easy to make. If you make sure you put the dough in the right area to rise (which, in my case, is a turned off oven with a bowl of hot water underneath it), then you're sure to have delicious breadsticks within a few hours. And on the time scale of bread-making, that's positively instant.

Ingredients

2 teaspoons active dry yeast

1 1/2 cup lukewarm water

1 teaspoon honey

1/4 cup extra virgin olive oil

2 cups whole-wheat flour

About 1 1/3 cups unbleached all-purpose flour

1 1/2 teaspoons salt

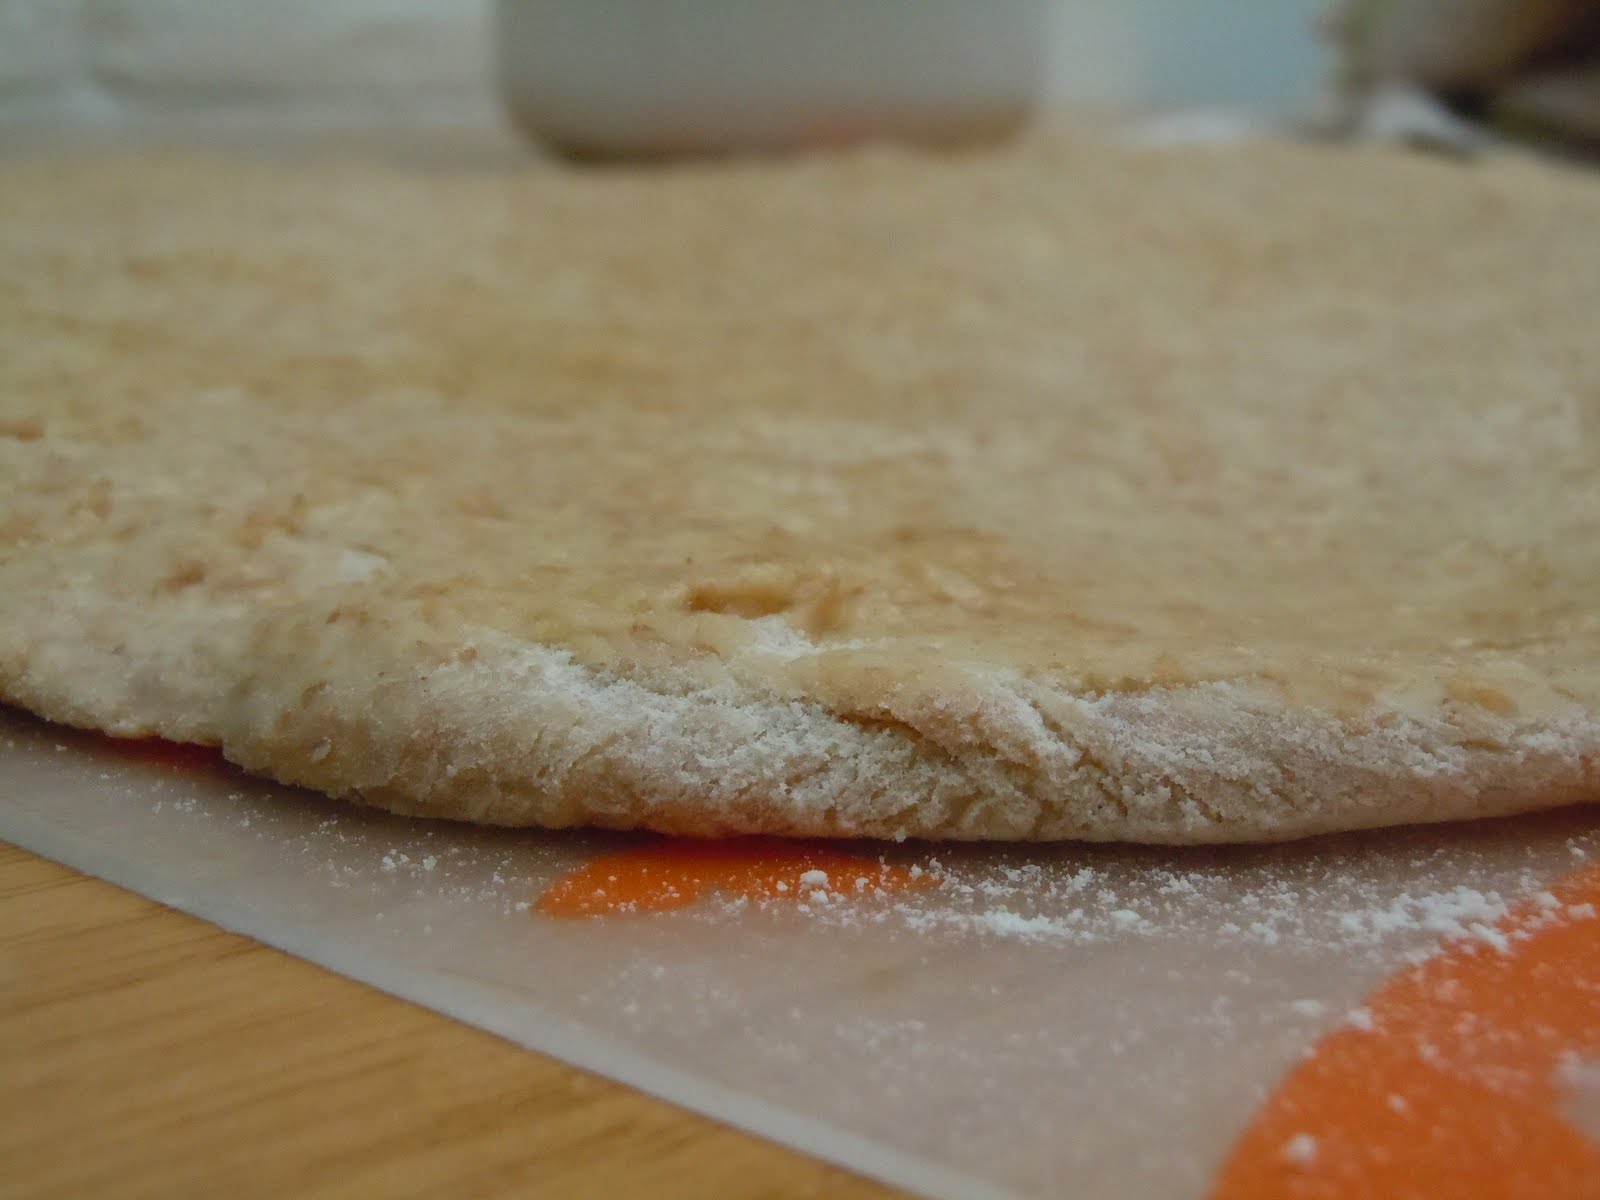
The rolled-out dough, just before being left to rise.

Method
Dissolve the yeast in the water in a large bowl or in the bowl of a stand mixer. Stir in the honey. Let stand for five minutes. Stir in the olive oil.

Combine the whole-wheat flour, the unbleached all-purpose flour, and the salt. Add to the liquid mixture. If kneading by hand, stir until you can turn the dough out onto a lightly floured surface; knead for 10 minutes, adding flour as necessary to keep the dough from sticking to your hands and worktop (I needed to add probably another cup of flour for this bit. Be liberal).

If using an electric mixer, mix at medium speed for 8 to 10 minutes. Add flour as necessary so that the dough comes away from the sides of the bowl. The dough should be elastic and just slightly sticky.

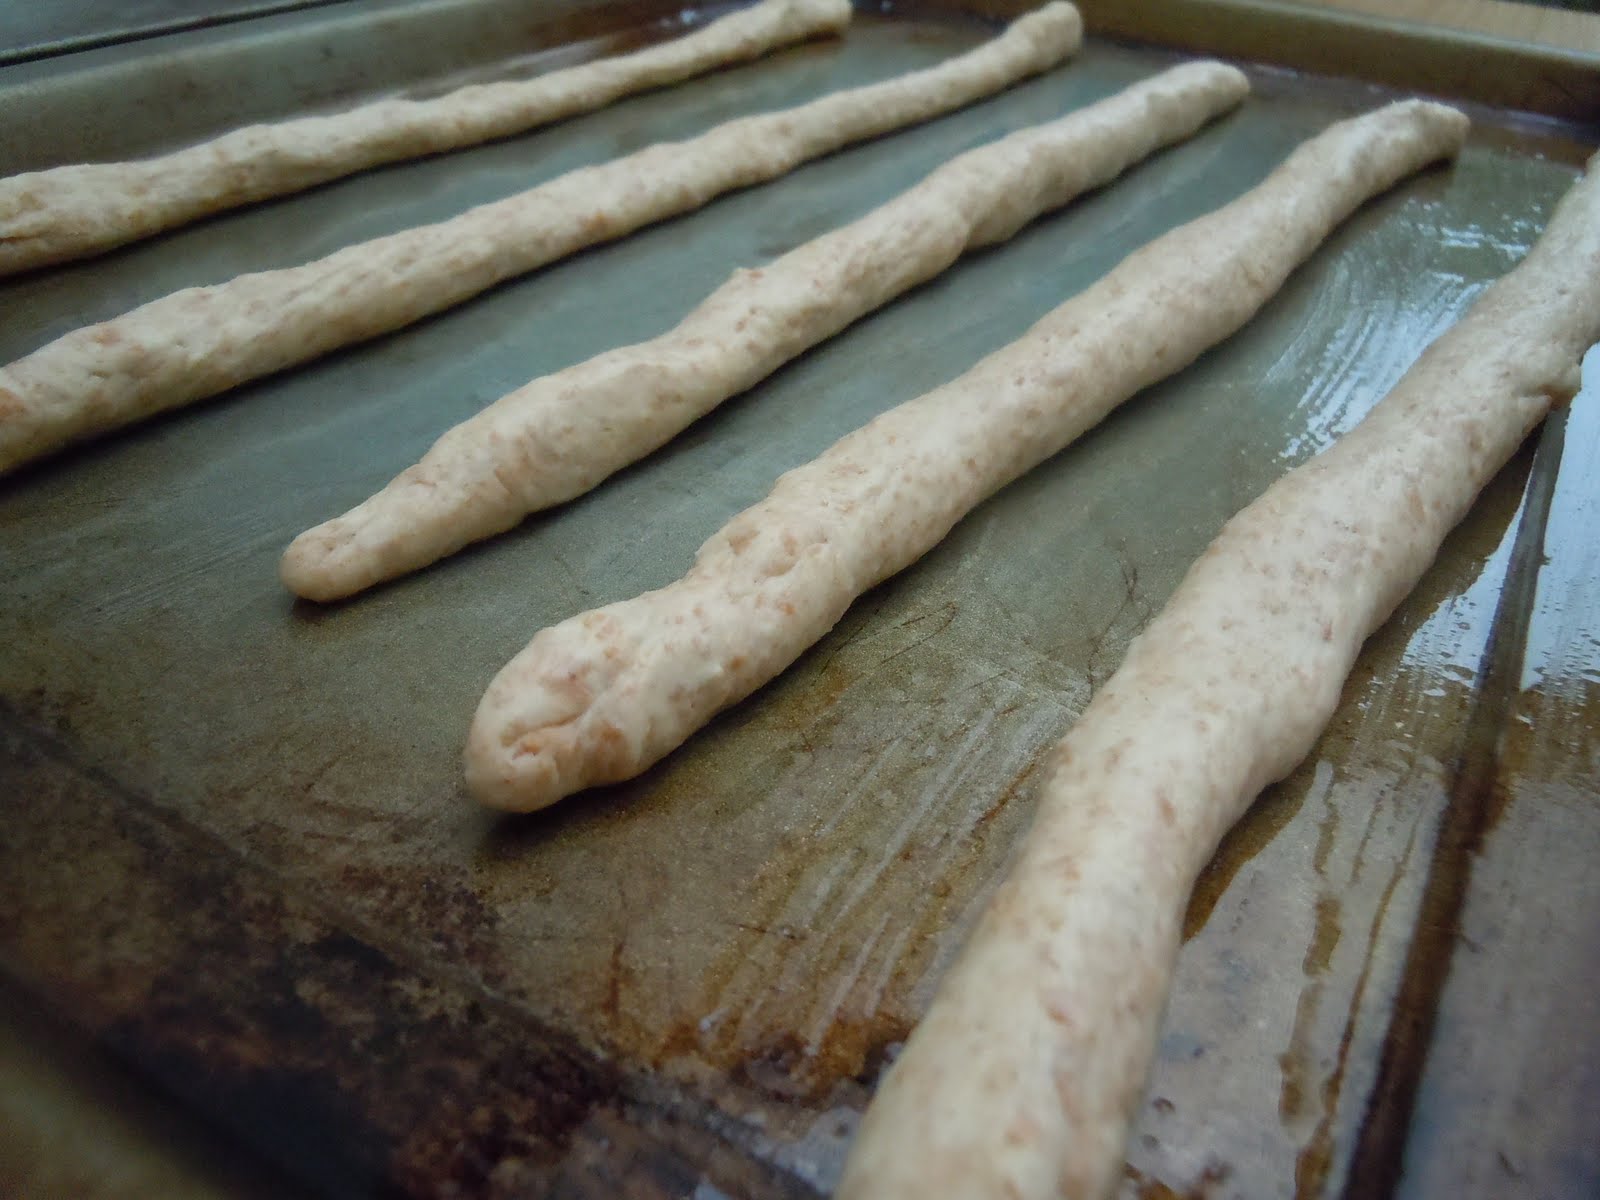
The dough, just before baking

 Lightly flour your work surface or brush with olive oil. Using your hands or a rolling pin, roll the dough into a 14-by4-inch rectangle. Make sure there is enough flour or oil underneath the dough that it doesn’t stick to the work surface. Brush the top with oil. Cover with plastic wrap, then with a damp kitchen towel. Allow to rise for 1 to 1 1/2 hours until nearly doubled. (Being England, I had no good place to let the dough rise. If you share my fate, turn on the oven on its lowest heat setting for a few minutes, then turn it off. Put a bowl of just boiled water on the bottom of the oven and then the dough above that. This will give a good damp atmosphere that should encourage your dough to rise.) 

Preheat the oven to 400 degrees with the racks positioned in the middle and upper thirds. Brush sheet pans with olive oil. Cut the dough crosswise into four equal pieces. One at a time, cut each piece crosswise into six equal pieces. Roll each piece between the board and your hands, as if you were making it into a rope, until it is as long as the baking sheet. For a tighter strip, twist the strands from one end to the other. Place 1 inch apart on the baking sheets until you’ve filled two baking sheets. Continue to shape the remaining breadsticks while the first batch is baking.

Place in the oven, and bake 15 minutes. Switch the pans top to bottom and front to back, and bake another 10 minutes until the breadsticks are nicely browned (they will be darker on the bottom). Remove from the heat, and cool on a rack. Shape and bake any remaining dough as instructed.

Maple-Oatmeal Fruit Crisp

I have no idea what the difference is between a crumble and a crisp. To me, they both involve fruit and a delicious crunchy topping, usually made out of oats, sugar, and butter.

Knowing bakers, there's probably some precise distinction between the two (you melt the butter before you add the oats in a crisp, or some such thing), but, I can't be bothered to find out what it is.

That being said, whether they are crisps or crumbles, they are delicious. And perfect for summer. And the perfect way to make a lazy dessert. Cut up fruit. Add flour, oats, sugar, and butter. Bake. See? Nothing to it. And because you can add whatever fruit is in season at the time, you get to come up with your own endless varieties of the dessert. Because I focus less on the measuring and more on getting the thing baking, I've never made the same crumble twice. But that's not to say they weren't all delicious.

Now that I've insisted on the unnecessary element of measuring in a crumble/crisp, I present the following very measure-based recipe, straight from the annals of NPR and their kitchen window series. While I'm usually an "organic" crumble-maker (measurements are for wusses), I wanted to try their very complex version, to see if there was a way to improve on the glories of easy crumble making.

And when I say complex, I mean it took me 7 minutes instead of 5 to make. But still. Coconut? Walnuts? Cranberries? Maple syrup?! NPR, calm thyself. There's no reason to get so darn complicated. But, the recipe was delicious. So if you're feeling like you need a little extra complication in your baking life, this crumble is for you. If I'm ever pressed to serve crumble at a dinner party (and why wouldn't you?), this might be a good bet to show off the dressed-up nature of the dessert. Otherwise, for an easy dessert, I might go back to my basics: oats, flour, sugar. Or, if I'm honest, the ready-made crumble topping at Tesco (shhhhh, don't tell anyone). ;)

Makes 6-8 servings

Ingredients

Topping

1/4 cup whole-wheat flour

3/4 cup rolled oats (or more)

1/4 cup sugar

4 tablespoons butter

3 tablespoons maple syrup

Filling

3 peaches or other stone fruit, pitted and chopped

1 cup blueberries, raspberries or blackberries, or a combination

1/4 cup dried cranberries

4 tablespoons chopped walnuts or almonds

1/4 cup unsweetened flaked coconut

1/2 teaspoon ground cinnamon

1/2 teaspoon ground ginger

1 tablespoon flour

5 tablespoons maple syrup

Method
Preheat oven to 350 degrees.

Mix the flour, oats and sugar together. Cut in the butter, working the mixture until it resembles coarse meal. Drizzle in a bit of maple syrup, adding more if the mixture is very dry.

In a large bowl, mix the fruit, nuts, coconut, cinnamon, ginger and flour together and stir well to combine. Drizzle with maple syrup to taste (if the fruit is not too sweet, add a little more).

Spread the fruit in an 8-inch square baking dish and cover with the topping. If the topping doesn't cover all the fruit, sprinkle more oats on top. Be liberal.)

Bake for 30 to 40 minutes, until fruit is bubbling and topping is crisp.

Fried Okra

I do not hail from a part of the country where okra is a staple. No, no. I'm from the other side. The anti-okra side. The confused okra side. The side that sees the weird foreign slimy vegetable and think: "Really?" 
But my anti-okra statement was predicated on nothing if not so much as a misunderstanding of southern cuisine. If you see an ingredient that you don't like, bread it and fry it. Which 100% of the time = crazy delicious.

And so it is with okra. And as it was available at copious cheap amounts at my local farmers market, I decided to test my southern style by "frying up a batch".
And it can't be simpler. Slice okra. Add cornmeal and flour. Maybe some spices. Fry. 
But I don't trust my okra knowledge, not yet. And so I drew inspiration from a self-proclaimed southerner. 
And so I set myself the task of frying up the most questionably authentic okra I've ever attempted. And it was delicious. So delicious. It won't win any awards for nutrition, but damn, I want to make this every day. 

Ingredients

-A fair amount of okra (I would say about 3 handfuls was enough for 2-3)

-A splash of milk or cream (I used cream, but honestly, you could even omit this)

-1/4 cup self-raising flour

-1/4 cup cornmeal (yellow or white, I use yellow)

-1 tsp paprika

-1 1/2 tsp cayenne pepper

-1 tsp achiote (if you have it, really any spice works)

-salt and pepper to taste

-Vegetable oil 

Method

Mix your breading. Combine flour, cornmeal, and spices and season with salt and pepper.

Wash and slice your okra into small rounds, no more than a half an inch thick. Place slices in a large bowl.

At this point, heat the oil in your pan. You want to have enough oil so that it just barely covers the bottom of the pan (if you add too much, you may end up with soggy okra which would be a tragedy).

If using the milk/cream, add it now to the okra. Remember, just a splash! Mix the okra and cream well.

Now add the breading to the okra, again stir to combine and make sure each piece is coated.

Test the oil in your pan to see if it's ready. Throw a piece of okra in and if small bubbles emerge around it, you're good to go. You don't want to see a crazy rush of bubbles, otherwise your pan is too hot.

It may not look beautiful, but, trust me, it's delicious.

Add the okra in a single layer to the pan and leave it alone. Really. Don't indulge the inclining to stir. Let it fry. (Otherwise, you'll lose the breading.)

After a few minutes, about 2-3, see if the bottom of the okra is turning golden-brown. If so, you are now ready to flip. Turn the okra over with a spatula and now let the other side fry up nicely.

When both sides are nicely golden brown, take it out of the oil and leave it to drain on paper towels. Serve hot and enjoy.

Ham Hock with Potatoes and Apples

The proud Hock o' Ham

What was I saying about "proteins with stuff"? Well, this certainly qualifies. Actually, this recipe alone could be the reason why I still call myself a proud meat-eater. Apart from the fact that this dish takes forever to make (no last minute weeknight dinners here), this dish has little to complain about.

The featured meat is what is usually termed in my world a ham hock, but is to the Brits apparently a pork knuckle. Who knew? Anyway, it's one of the cheaper cuts of meat around and just one of these puppies will easily feed three people. You have to make sure to get the uncured kind for this recipe. This took a bit of searching for me, but it will let the flavors of the caraway seeds and garlic really shine through. Nothing, however, will explode if you can't find one and must use a cured one instead. Such is life, right?

This recipe combines all things British and American in my mind. A ham hock will quintessentially be Yankee fare, but the "roasting" element of this recipe does waver towards the British side of things. It also (as a bonus) features a make-your-own-pork-crackling element. Well, if I wasn't sold before...

Nigella Lawson, also, the reigning sultry queen of the British kitchen must be thanked for this recipe. Oh Nigella, the things you do for us. All while wearing revealing clothing.

Ingredients

2 tsp sea salt flakes (or 1 tsp pouring salt)

1 tsp caraway seeds

2 garlic cloves, crushed or grated

2 pork knuckles (also called hocks), rind scored

2 onions, peeled and sliced into rounds

2 eating apples, cored and quartered

4 baking potatoes (or 1kg/1lb 2oz other main-crop potatoes), cut into quarters lengthways

500ml/17fl oz good-quality amber or dark beer (not stout, I used Wychwood amber beer)

500ml/17fl oz boiling water

Method

Preheat the oven to 220C/425F/Gas 7. Put the salt and caraway seeds into a bowl, add the minced or grated garlic, and mix everything together. Rub the pork knuckles with this mixture, getting right into the slits in the scored rind.

Make a bed or platform of the onion slices in the bottom of a deep-sided roasting tin. Sit the pork hocks on this onion layer and cook them in the hot oven for 30 minutes.

Take the tin out of the oven and quickly arrange the apples and potatoes around the pork knuckles. Carefully pour over 250ml/9fl oz of the beer, aiming for the pork knuckles so they’re basted as the liquid is poured into the tin. Return the tin to the oven, turning this down to 170C/325F/Gas 3. Continue to cook at this lower temperature for two hours.

Turn the oven up again to 220C/425F/Gas 7, pour the rest of the beer over the pork knuckles, and continue to cook at the higher temperature for another 30 minutes.

Take the tin out of the oven and transfer the apples and potatoes to a warmed dish. Lift the hocks onto a carving board, leaving the onion and juices in the tin.

Put the tin on the hob over a medium heat and add the boiling water, scraping any burned onions up from the bottom of the tin using a wooden spoon to de-glaze the tin and make a gravy.

Meanwhile, take the crackling off the pork knuckles and break it into pieces. Pull apart or carve the meat and pile it onto plates with the apples and potatoes. Pour over the gravy and serve with some German mustard.

Four-Spice Salmon

I'm all about easy proteins right now. A full day at work doesn't inspire the kinds of long-simmering stews and fussy pastry that were getting my appetite going during the winter months. I usually shy away from the "meat with stuff on it" preparation method, but in recent weeks I've been won over to the cause. A pork tenderloin with a bit of mustard and oil on it can be delicious and the same goes for a spice-rubbed salmon. Dishes that can be made in the space of 10 minutes flat and you have yourself a hearty main dish.

Thus it was that I tried Bittman's Four-Spice Salmon, something he insists is the best thing ever. I had not had spice-rubbed anything in recent memory so I was keen to give it a try. The dish gets absolute points for ease in preparation but, while I gleaned over his wordy paragraphs about the need to grind your own spices and harvesting your own local fillet from the salmon farm down the street, I realized that in this case, he may have been right.

This dish needs oomph. Ooomph it does not get from pre-ground spices and Tesco-brand salmon. Believe me, the flavors are there, hidden in the background. You know that there's potential for spicy extravagance as you bite into your fillet.

But it needs a kick, and unless you can do the aforementioned grinding and harvesting, my solution to this problem is to nudge the spiciness quotient up a notch. I suggest some chili flakes or powder, just to add a bit of heat to the dish. It doesn't mask the other delicious combination of flavors of the spice rub, but if you, like me, are stuck with brand X spices, this may bring out a tad more flavor in the dish than otherwise.

Having done that, the dish is an absolute win. A main course that is not your standard boring salmon fillet "with stuff on it". It's a beauty. One I will be using again.

Ingredients

4 6-ounce, skinned salmon fillets
Salt and freshly ground black pepper
1 tablespoon coriander seeds or ground coriander
1/4 teaspoon whole or ground cloves
1 1/2 teaspoons cumin seed or ground cumin
1 teaspoon freshly grated nutmeg
1 tsp chili flakes or power (or to your taste)
2 tablespoons peanut oil, grape seed or other neutral oil, or clarified butter

Method

Season fillets on both sides with salt and pepper. If necessary, combine spices and grind them to a coarse powder in a coffee or spice grinder. Press some of the mixture onto the top of each fillet.

Preheat a large nonstick skillet over medium-high heat for 2 to 3 minutes. Add the oil or butter and, when it shimmers, place the fillets, coated side down, in the pan. Cook about 2 to 3 minutes, or until the spice mixture forms a nicely browned crust.

Turn the fillets and cook for another 2 to 3 minutes, or until the salmon just slightly resists when pierced with a thin-bladed knife.