Ground Coriander and Cilantro Flatbreads with Indian Raita

I have already waxed lyrical on this blog about the double-edged sword that is making bread.
Sure, it's amazing. But it takes forever. Who has that kind of time?
Kneading. Rising. Proofing. Baking.
Bah.
I rarely have the willpower for even the unrivaled glories that are fresh-baked loaves straight from the oven.

But that's the glory of bread. It comes in all shapes and sizes, and most importantly, requirements expected of the would-be baker.
Behold: the flatbread.
No stupid yeast to deal with. No needing to let it rise. No hours waiting by the oven. These things are deliciously instantly gratifying. Mix some flour with baking power and soda, throw in a few ingredients. Stir. Roll out. Throw in the pan. Wait 3 minutes.
Presto: fresh baked flatbreads.
Soft, warm, heaven on earth.

I couldn't believe how easy and delicious this recipe was. I went website-diving in search of flatbread recipes when my local flatbread supplier, a woman who literally makes my Saturday at the weekly farmer's market, ran out unexpectedly. This has potentially disastrous consequences. Without my usual supplier to my flatbread fix, I turned to the internet in desperation. I never had an idea that the recipe I stumbled upon (provided by the geniuses at Bon Appetit) would become an instant classic. Combine it with Indian raita (recipe follows the flatbread recipe) they had as an accompaniment?
I may never need the flatbread lady ever again.

Ingredients

  • 1 1/2 cups (or more) unbleached all purpose flour 
  • 3 teaspoons ground coriander
  • 1 1/2 teaspoons baking powder
  • 3/4 teaspoon salt
  • 1/2 teaspoon baking soda
  • 1/3 cup chopped fresh cilantro
  • 3/4 cup (or more) plain whole-milk yogurt
  • Olive oil (for frying)

Method
Sift first 5 ingredients into medium bowl. Stir in cilantro. Add yogurt and stir with fork until small clumps form. Knead mixture in bowl just until dough holds together, adding more flour or yogurt by tablespoonfuls for soft and slightly sticky dough. Turn dough out onto floured surface. Knead just until smooth, about 1 minute. Divide dough into 8 equal pieces.

Roll each piece into ball, then roll each dough piece out on floured surface to 4 1/2-inch round. Brush large nonstick skillet generously with olive oil; heat over medium heat. Working in batches, add 3 dough rounds to skillet; cook until golden brown and puffed, adjusting heat to medium-high as needed to brown evenly, about 3 minutes per side. Transfer flatbreads to platter; serve warm.

Traditional Indian Raita
Ingredients
  • 1/2 cup plain yogurt
  • 1/2 cup chopped seeded English hothouse cucumber
  • 2 tablespoons chopped fresh cilantro
  • 2 teaspoons chopped green onions
  • 1/4 teaspoon ground coriander
  • 1/4 teaspoon ground cumin
Method
Mix all ingredients in medium bowl. Season to taste with salt. Chill raita, covered, until ready to serve.

Cucumber-Basil Egg Salad

I have a certain penchant for egg salad. My mother would rarely make it, but, oh goodness, when she did...
Heaven.
Eggy, mayonnaise-y, heaven.
I rarely make it myself, particularly after I saw just how much mayo went into it. Also, after years of bad deli experiences, my longing for it fizzled and slowly died.
But then I found myself with a bunch of hard boiled eggs on my hands. In a fit of "hardboiling" for the "Fish and Broad Bean Salad" recipe, I had boiled an entire carton of eggs and I was left with many many hard boiled leftovers with little to do with them.
If there was ever a time to justify egg salad...
But my fears about mayo overdose remained and so I trawled the internet searching for an egg salad that downplayed the white stuff and front-loaded other ingredients.
And Epicurious.com came to my rescue. Their recipe for an egg salad infused with cucumber and basil seemed exactly what I was looking for. Yes, it still called for 1/2 cup of mayonnaise, but I could work with this. After a little tweaking, I found myself in the possession of a fresh "healthier" version of egg salad that was absolutely phenomenal. Enough mayo had gone into the recipe to evoke memories of the mayo-drenched creations of my past, but supplementing some of the mayo with yogurt, plus the addition of cucumber, basic, and celery, gave it a much more refined feeling.

This recipe may not satisfy everyone's yen for egg salad (after all, I ended up only putting 3 eggs into it), but for me, it was the perfect balance.

Serves 2


Ingredients

3 hard-cooked eggs, diced
3/4 cup seeded, diced cucumbers (about 1/2 cucumber)
1/4 cup minced shallots
1/2 cup sliced green onions (green part only)
2 celery stalks (chopped)
3 tablespoons lightly packed chopped fresh basil (I used probably about 5 tbsp)
1/4 cup mayonnaise (I also used a blend between regular mayo and a onion/mustard mayo I had found at Tesco)
1/4 cup Greek yogurt
1/4 teaspoon kosher salt
1/4 teaspoon freshly ground pepper
1 teaspoon white pepper

Method

Gently combine the eggs, cucumbers, shallots, celery, green onions, and basil in a medium bowl. Stir in the mayonnaise, yogurt, salt, and peppers. 
Store in the refrigerator for up to three days.

Slow-Cooked Fish and Broad Bean Salad

This recipe (from the City Kitchen blog on the NY Times) was supposedly all about the joys of slow-cooked tuna (NOT out of a can!) and fresh shell beans.
Bah.

I'm all for the slow food movement. And I'm all for fresh shelled beans. I'll even give an "amen!" to the non-canned tuna. But unless a farmer's market and local fishery show up outside my door tomorrow, there was no way I was going to acquire either "crucial" item for this recipe.

So I improvised.

Fresh skinless albacore tuna morphed into haddock and the fresh shell beans became the frozen broad beans stocked by your friendly neighborhood Tesco. The best of all possible worlds? Certainly not. But, alas, this is what we have to work with. And, honestly, skin on fish is not the end of the world. Man up, people. It's delicious.

Anyway, don't get me wrong, this "salad" does take some time. But not nearly enough time as I feared. The fish cooks in about 20 minutes, during which time you can be doing all the slicing and dicing and reheating of frozen broad beans required. Speaking of how you cook the fish...you don't cook it. You poach it. In olive oil.
Hot damn.
I'm often wary of cooking fish, because I dread the schoolboy error of overcooking it and turning it into some sort of dry tasteless slop. Why don't they tell you there's an easy solution to this? Bathe that sucker in olive oil! Unless you forget the fish is in the oven and wander away in a fog, there's almost no physical way to overcook this. Granted, the less time the fish spends in the oven, the better. But still. Almost foolproof.

Time: About 1 hour

For the Fish:

1 pound skinless albacore fillet (or haddock in my case)
Salt and pepper
½ teaspoon red pepper flakes (I used guajillo chiles)
½ teaspoon marjoram
3 garlic cloves, roughly chopped
1 small rosemary sprig(or 2 tsp. dried rosemary)
½ cup olive oil, approximately


For the Salad:
1 cup finely diced red and yellow bell pepper
½ cup finely diced sweet white or red onion
A pinch of red pepper flakes
2 tablespoons red wine vinegar
1 small garlic clove, smashed to a paste with a little salt
2 tablespoons olive oil
Salt and pepper
1 tablespoon chopped basil or mint, or 1 teaspoon chopped marjoram
2 cups cooked shell beans (from about 2 pounds in the pod, or, you guessed it, cooked from frozen, just like nature intended)
2 or 3 hard-boiled eggs, shelled and halved, optional.

Method

1. Heat oven to 350 degrees. Cut the albacore into inch-thick slices and place them in a small ovenproof dish. Season generously with salt and pepper. Put the red pepper flakes and marjoram in a mortar or spice mill and make a rough powder. Sprinkle over the fish. Add the garlic and rosemary. Add oil to a depth of ½ inch.

2. Cover the dish and place in the oven for 10 minutes. Remove from the oven, turn the slices over, then return to the oven for another 10 minutes. The albacore should be cooked through, but barely. Let the fish cool in its dish, uncovered. Store the fish in its cooking juices in the refrigerator for up to a week. Bring to room temperature to serve.

3. To make the salad, toss the peppers, onion, pepper flakes, vinegar, garlic and olive oil in a large serving bowl. Season well with salt and pepper and stir in the basil, mint or marjoram. Add the shell beans, draining them well first, and the cooked albacore, broken into large pieces, and mix together. Serve with hard-boiled eggs, if you like.

Yield: 4 to 6 servings.

Spicy Smoky S'mores Bars

Oh s'mores. Simple yet enduringly delicious. And, surprisingly perhaps, quintessentially American. I attribute this to the lack of the campfire concept in Britain. Although I haven't been camping here myself, I have had enough North American friends go off packing into the wilds of Cornwall or Somerset to come back and bemoan the lack of a proper campfire. Apparently it's just "not done" in England. Tis a shame. For without campfires there cannot be a proper s'more experience. 

But it's not just the campfire. Not really. No, this country will never appreciate the s'more until graham crackers are accepted here. Because honestly, when a recipe (if you can even call the directions for s'mores that) calls for only three ingredients, you'd better have all three. I don't care what they say about using biscuits (the British kind, mind you), tea cakes, cookies, what have you. There is something strangely unique about the graham cracker. And its presence (or lack thereof) will make or break any good s'more recipe.

I digress.

I miss s'mores, sure. But I hadn't thought about them in years. Not until a recently published article on Slate talked about the wonders of cooking shows and their potential to get you to, well, cook. Now, I haven't seen the show which this recipe comes from (Ann Thornton, we salute you) but this recipe is living proof that not just shows can get you to cook, articles about cooking shows can get you to cook equally as well (ok, well, maybe I'm a captive audience, but still). As soon as the article mentioned something about s'mores bars with chipotle chile, there was no going back. As the article said: I had to make them.

So I did.

But alas. I am in a graham-cracker free country. The fact that usually suppresses any lingering urge in me to make s'mores. But no. This was too delicious-looking a recipe to pass up. I would press on. And so I found myself trawling the biscuit aisle of Tesco, vainly in search of something that resembled the quintessential American graham cracker. In the end, I decided on a mixture of butter and ginger biscuits. Yes, yes, I know. Twas not a graham cracker. Biscuits are too sugary- too full of butter. They don't have the glorious thin "crispness" of the graham cracker. But desperate times, people. Desperate times.

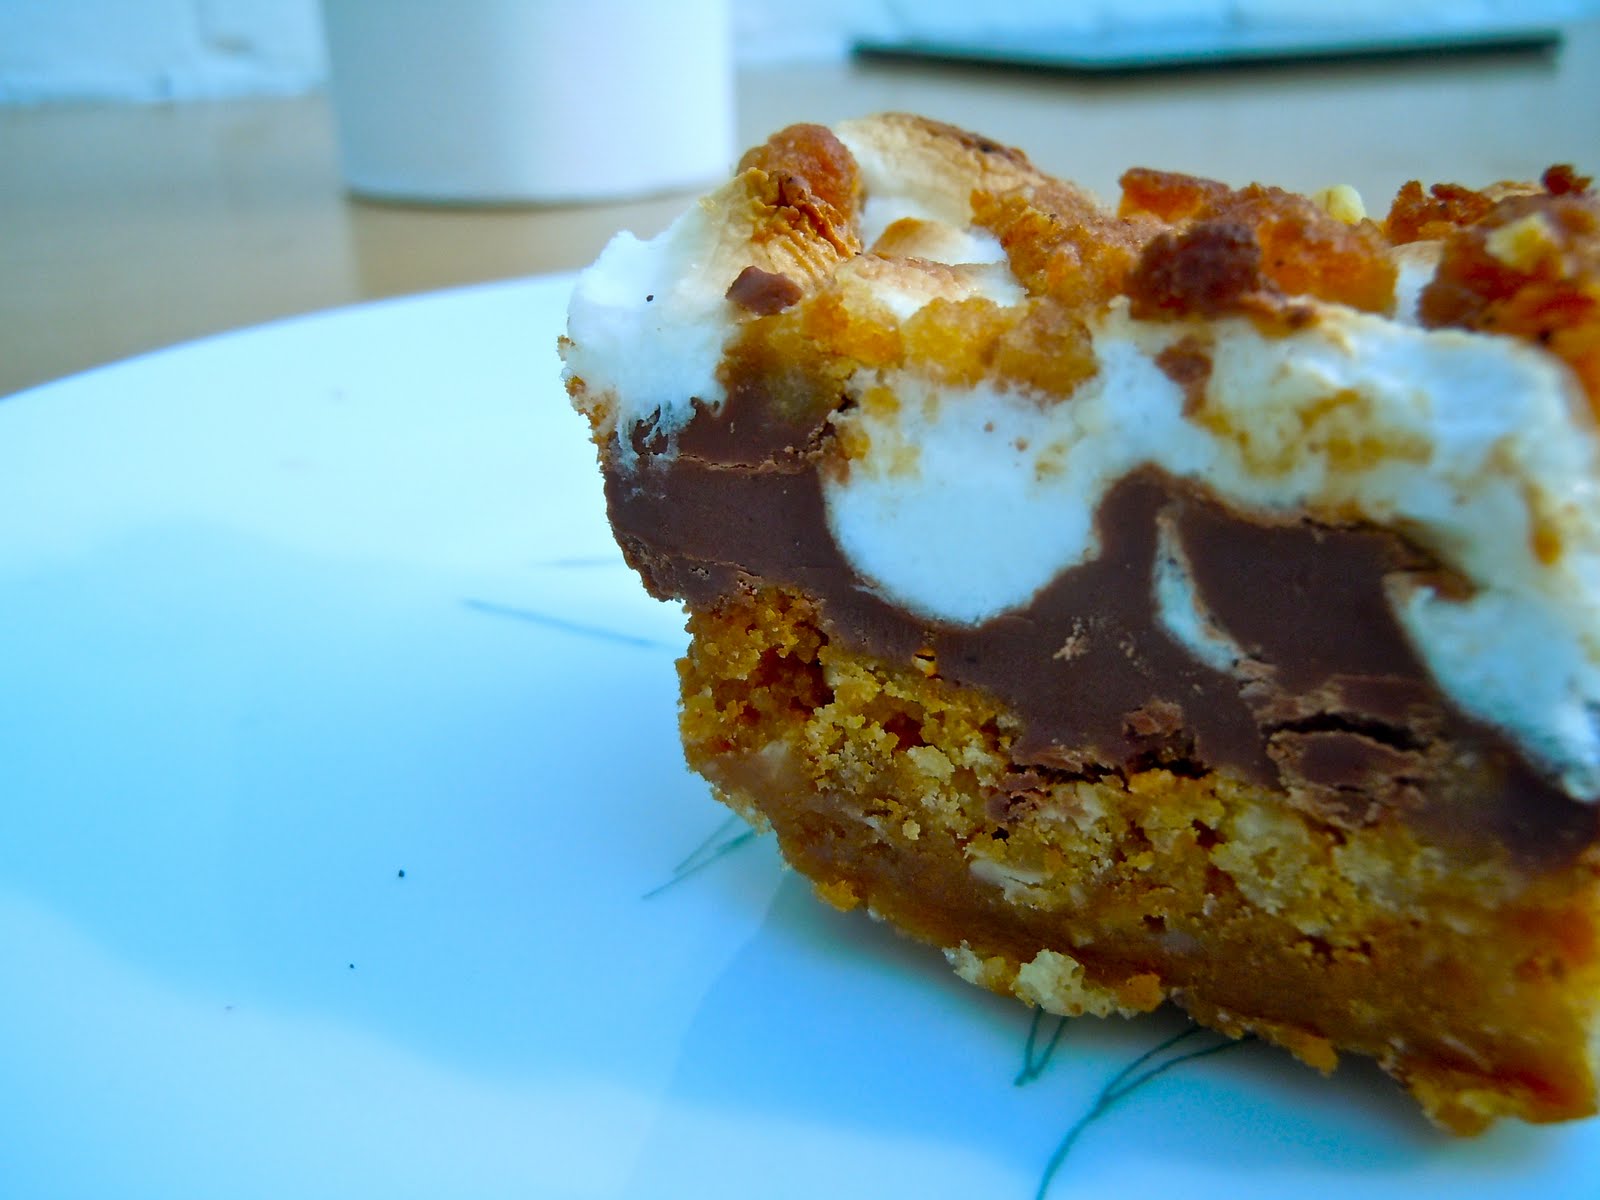
And did I mention these things are ABSOLUTELY DELICIOUS? Oh goodness. You can't get enough of them. They feature the same magical simple goodness as original s'mores, the kind that leaves you wondering how just a few ingredients can turn into utter bliss. These things are dangerous, I warn you now.

Made even more so by the fact that the recipe is simple as pie. Despite lack of graham, the biscuit base did just as well (I mean, honestly, they're biscuits. They were not going to taste horrible). True, it was not the original s'more all Americans know and love, but these bars are so more-ish (to use a British phrase) anyway that you forgive them their shortcomings. True s'mores will have to wait for American soil, but in the meantime, these will do quite nicely.

Ingredients
1 1/2 sticks unsalted butter, melted, plus more, softened, for pan
18 plain graham crackers (about 2 packages) (or, if in Britain, a combination of ginger and butter biscuits, probably around 15-20 in total)
1/4 cup sugar
3/4 teaspoon fine sea salt
2 cups milk chocolate chips
1 cup (or 1 bar) dark chocolate (I used Green & Black's Maya Gold chocolate)
3/4 teaspoon chipotle pepper powder
1/2 teaspoon ancho chile power
1/4 teaspoon cayenne
3 1/2 cups mini-marshmallows

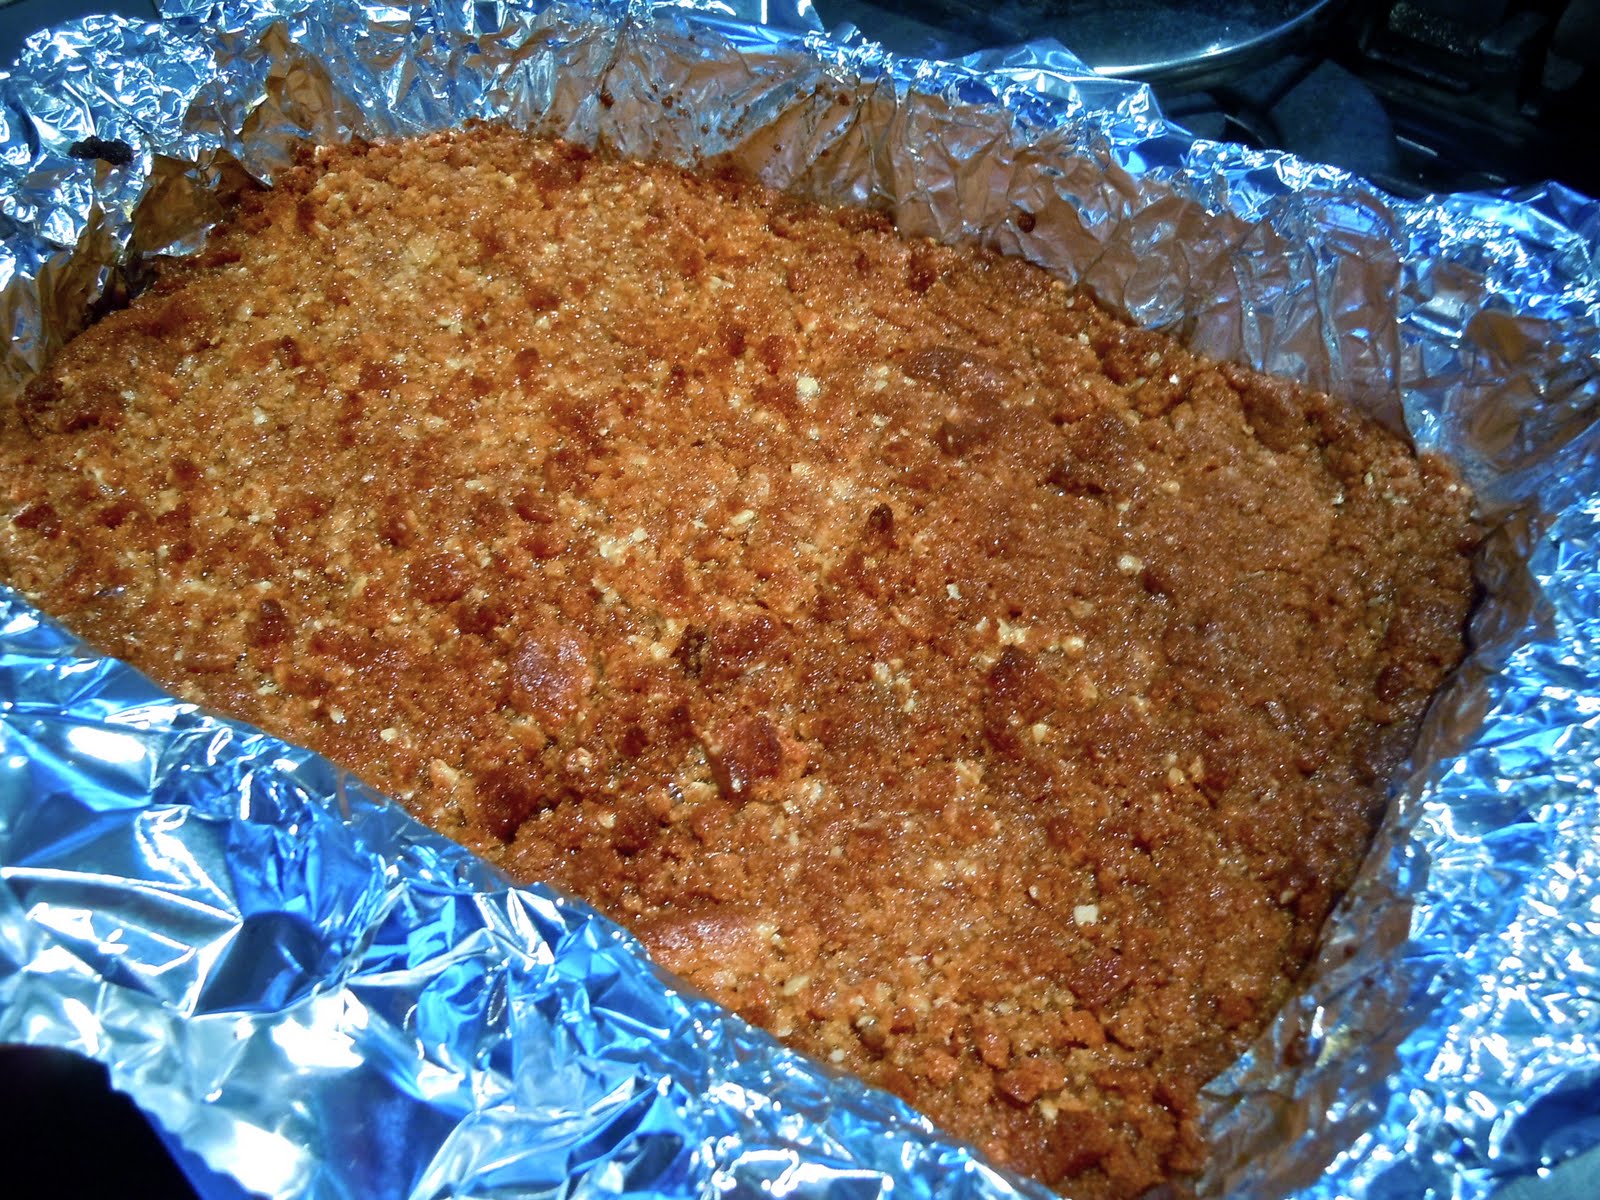
The graham cracker (ok, biscuit) crust

Directions
Preheat the oven to 350 degrees F (or approximately 175 C). Line the bottom and sides of a 9 by 13-inch baking pan with foil. You want to leave about 4 inches of overhang on the 2 opposite sides. These are going to serve as your handles to remove the bars from the pan in 1 piece, so make sure that there is enough of the overhang for you to have a solid grip. Grease the foil well with the softened butter.

In your food processor (or in a plastic bag), grind the graham crackers into a fine meal (you need 2 cups). In a large bowl, combine your crumbs with the sugar, sea salt and melted butter. The mixture should look and feel like wet sand. Set aside a heaping 1/2 cup of the crumb mixture for the topping. Evenly press the remaining crumb mixture into the bottom the foil-lined pan. Pop your crust into the oven and bake until it is golden brown and your kitchen smells of graham crackers, 12 to 15 minutes. Remove the crust from the oven and allow it to cool on a rack or on a dishtowel on your counter.

The bars, pre-broiler

Melt the milk chocolate in a saucepan over low heat, stirring continuously until fully melted. Do not turn up the heat to hurry this process, you must keep it on low. Alternately, you can microwave the chocolate on low power, stirring after 2 minutes. Once the chocolate is fully melted, it's time to add various chile powders, if using, and stir it in completely.

Preheat the broiler.

Pour the melted chocolate over the cooled graham cracker crust. Spread the chocolate evenly over the crust with a butter knife. Sprinkle the marshmallows over the chocolate and press them lightly into the chocolate. Sprinkle the reserved crumb mixture over and in between the marshmallows so that you cannot see the chocolate peaking through the marshmallows. Broil the bars 6 inches from the flame until the marshmallows are golden brown, 1 to 2 minutes.

Refrigerate the bars until the chocolate is hard, 2 hours or so. Grab the ends of the foil liner and lift the bars out of the pan in 1 piece. Move to a cutting board and cut into 24 squares.

Hello world!

Welcome to WordPress.com. After you read this, you should delete and write your own post, with a new title above. Or hit Add New on the left (of the admin dashboard) to start a fresh post. Here are some suggestions for your first post.

  1. You can find new ideas for what to blog about by reading the Daily Post.
  2. Add PressThis to your browser. It creates a new blog post for you about any interesting  page you read on the web.
  3. Make some changes to this page, and then hit preview on the right. You can alway preview any post or edit you before you share it to the world.