The Big Pig: Momofuku Bo Ssam

Pork and coffee are perhaps the *only* two reasons to find oneself not only conscious but outside in 20 degree weather (Fahrenheit, not Celsius) at 7:20 in the morning. And it better be good pork. The coffee is, well, just a necessity of life.

But the pig was going to be good. The recipe came from the revered chef, David Chang, of New York's Momofuku fame. The man knows his pig. And this recipe is a pork-lover's dream.

But dreams take work. Lots of work. "Getting up early so the stupid pig can marinate properly" work.

So that's how I found myself at the butcher's at a horrifically early hour to purchase what David Chang (and apparently the rest of America)  interestingly calls "pork butt" or "picnic ham". Well, try saying that to a British butcher and not getting laughed out of the store. A quick perusal of the web gave me the right vocab to attack the situation. Ah...Boston butt! That'll explain everything!
Lies.
At least the web let me know what part of the piggy I was actually ordering, which as it happened, was the shoulder. That solved all problems.
So FYI, chefs, if ordering from a butcher in the UK, you want bone-in pork shoulder for this recipe.

But this was just step one of a full day pork-lover's marathon. The pig had to marinate in a crust of salt and sugary goodness for 6 hours. It had to be slowly roasted for another 6 after that. And then, as the piece de resistance, it had to be practically incinerated for 15 minutes to get that fabulously crackly sugary skin that everyone loves so much. Needless to say, this was going to take some time. And that doesn't even mention the sauces. Not one, but two sauces. Hey, this recipe is all about time investment.

But thankfully the sauces take little to no time to put together while the pig is roasting away. Apart from mincing 1/2 cup of ginger (which takes just as long as you think) and slicing some scallions/spring onions, it's a fairly quick job.

So piggy and I spent the day together. But there was no way I was eating piggy alone. This is a recipe for a veritable army. It serves *at least* six people, so start calling up friends, neighbors, and hey, people you find on the street. But guard that beautiful crackling skin wisely. Everyone knows it's the best part and you'll have to fight long and hard to keep some for yourself once they try it.

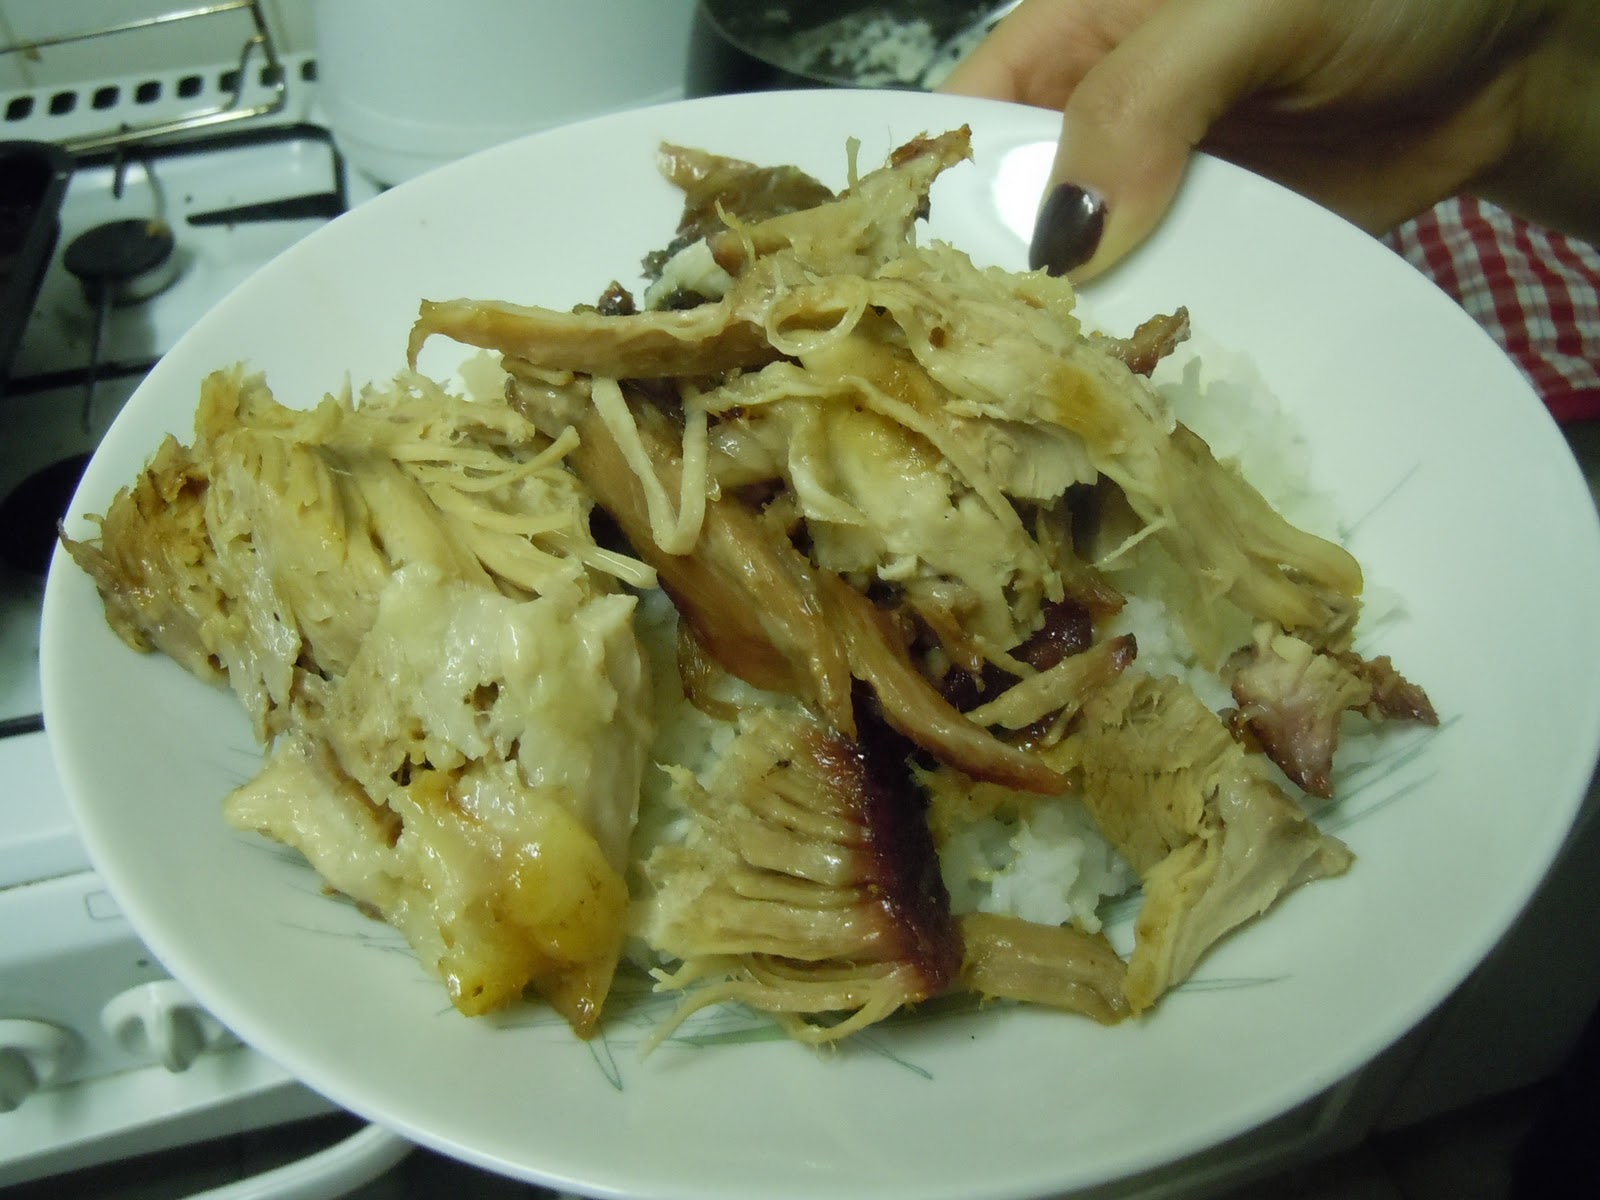
Serve the bad boy on top of plain white rice and set the condiments out for people to taste and try as they see fit. Of course, the pig was delicious on its own, but I have to hand it David Chang, the sauces made it even better.

Serves 6-10

Ingredients (Recipes for sauces follow)

The big pig at the start of the day

Pork Butt

1 whole bone-in pork butt, picnic ham, or pork shoulder (depending on your geography) approx. 8 to 10 pounds or 4-4.5 kilograms

1 cup white sugar

1 cup plus 1 tablespoon kosher salt

7 tablespoons brown sugar

Method for Pork
Place the pork in a large, shallow bowl or roasting pan. Mix the white sugar and 1 cup of the salt together in another bowl, then rub the mixture all over the meat. Cover it with plastic wrap and place in the refrigerator for at least 6 hours (or, if your fridge is full and there happens to be a wintery tundra outside, wrap that puppy well and stick it outside), or overnight.
The pig in salt and sugar
When you’re ready to cook, heat oven to 300. Remove pork from refrigerator and discard any juices. Place the pork in a roasting pan and set in the oven and cook for approximately 6 hours, or until it collapses, yielding easily to the tines of a fork. (After the first hour, baste hourly with pan juices.) At this point, you may remove the meat from the oven and allow it to rest for up to an hour.
The pig at the 4 hour mark
The pig after 6 hours
Make your sauces and prepare 2 cups of white rice (see recipes below) and kimchi if desired. When your accompaniments are prepared and you are ready to serve the food, turn oven to 500. In a small bowl, stir together the remaining tablespoon of salt with the brown sugar. Rub this mixture all over the cooked pork. 
The final step: brown sugar and salt
Place in oven for approximately 10 to 15 minutes, or until a dark caramel crust has developed on the meat. Serve hot, with the accompaniments.
The final product.  Pig heaven.


Ginger-Scallion Sauce

2½ cups thinly sliced scallions, both green and white parts

½ cup peeled, minced fresh ginger

¼ cup neutral oil (like grapeseed)

1½ teaspoons light soy sauce

1 scant teaspoon sherry vinegar

½ teaspoon kosher salt, or to taste

Ssam Sauce

Ssamjang and Kochujang

*Chef's note: The 2 main ingredients to the sauce requires a bit of searching in Asian markets. The ones I found come in tubs with fairly general descriptions such as "Red pepper paste" for kochujang. As always, it's best to ask just to make sure you're buying the right item!

2 tablespoons fermented bean-and- chili paste (ssamjang, available in many Asian markets, and online)

1 tablespoon chili paste (kochujang, available in many Asian markets, and online)

½ cup sherry vinegar

½ cup neutral oil (like grapeseed)

Accompaniments

2 cups plain white rice, cooked

Kimchi (available in many Asian markets, and online)

Method

To make the ginger-scallion sauce: In a large bowl, combine the scallions with the rest of the ingredients. Mix well and taste, adding salt if needed.

To make the ssam sauce: In a medium bowl, combine the chili pastes with the vinegar and oil, and mix well.

Prepare rice and put kimchi and sauces into serving bowls.

Restaurant Review: Spud (London)

England has a love affair with the baked potato. Sorry, I meant jacket potato. Forget serving this humble starch as a side dish, baked potatoes (with any variety of topping you could imagine) are frequently served as lunchtime fare in the UK.
Which explains how an entire restaurant has opened that serves only baked potatoes.
I admit, I was dubious.

Don't get me wrong, I love the tuber and all its various incarnations (roasted, scalloped, fried, the list is endless...), but I wasn't sure just how bowled over I was going to be by a baked potato lunch, despite the quirky website's (their slogan is "Eat Me"....erm, quaint?) promise of "serious food envy".
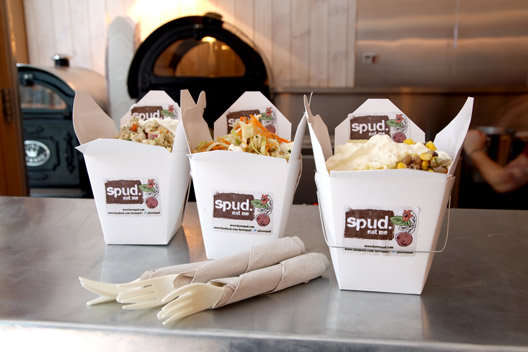
It's a small restaurant, tucked away in a small storefront in the Covent Garden area. You're presented with a number of "fillers" for your chosen baked potato (a sweet potato option is also available if you want to be *really* fancy). These range from your bog standard butter and salt to more elaborate options of goat cheese and lentil stew (which I sampled).

And, I have to say, I was impressed. For about 4 pounds, you have a full lunch (and I mean *full*). If elect to eat in, you also have the chance to visit their downstairs eating area which features fun Tiffany-esque lamps on each of the tables and an eclectic if fun soundtrack. It wasn't too busy when we went, but we were having a late lunch around 2pm.

All in all, it was a great cheap way to grab a weekday lunch in central London. The menu may be a tad small, but instead of going the "salad bar" route where you'd pick each individual topping yourself, the owners have taken time to find good and complex combinations of flavors that highlight the simple potato, elevating it to fun, trendy, but affordable cuisine. Thumbs up.

Green Gazpacho with Halloumi Croutons

Yes, you read that correctly. Halloumi croutons. Croutons. Of cheese. Why I haven't made these before is an absolute mystery. I adore halloumi, that wonderfully salty cheese from Turkey. It fries up beautifully and is best served warm. Yotam featured a recipe with them way back in the summer. I had always lusted after the croutons but had never warmed to the idea of a chilled soup.

How wrong I was.

As usual, we were faced with the typical veg-box conundrum. How to use up all the gloriously fresh vegetables before they went...well, not so fresh? And with the other option being 5,000 stir fries, gazpacho is the clear answer.

Since being home in Arizona for the last few weeks, I have gloried in the wonders of 80 degree heat in December and January. But I still longed for my soups, eating hot broths often in just a tank top and shorts. Gazpacho let me have my cake and eat it too. It was a triple crown: soup, using up the veg box, and cheesy croutons. I call that a win, win, win.

Serves 6

Ingredients

Croutons
80g dry breadcrumbs
Sunflower or canola oil, for frying
200g halloumi, cut into 2cm dice
1 egg, beaten
1 tbsp thyme, chopped
Salt and white pepper

Soup
3 celery stalks
2 small green bell peppers, seeded
2 long cucumbers, peeled
3 slices stale white bread (I used baguette)
1 fresh green chile
4 garlic cloves
1 tsp sugar
1 1/2 cup walnuts, lightly toasted
6 cups baby spinach
1 cup basil leaves
4 tbsp chopped parsley
4 tbsp sherry vinegar
1 cup olive oil
3 tbsp Greek yogurt
about 2 cups water
9 oz ice cubes
2 tsp salt
white pepper

Method
For the Soup:
Roughly chop the celery, bell peppers, cucumbers, bread, chile, and garlic. Add to that the sugar, walnuts, spinach, basil, parsley, vinegar, oil, yogurt, most of the water, the salt and some white pepper. Blitz it all with an immersion blender until smooth. Stir in the ice cubes. Add more water, if needed, to get your preferred consistency. Taste the soup and adjust the seasoning.

For the Croutons:
Mix the breadcrumbs with the thyme. Pour enough oil into a small saucepan so that it comes 2.5cm up the sides and place on medium heat. Once bubbles begin to rise to the surface, turn down the heat to medium-low and leave for a minute. Dip the halloumi in beaten egg, shake off any excess and then roll in the thyme breadcrumbs. Deep-fry in batches for a minute, until golden-brown – make sure the oil isn't so hot that the cheese sizzles vigorously when it goes in. Transfer the cooked croutons to kitchen towel to drain.

Serve the soup immediately with the croutons on top.

Zucchini and Hazelnut Salad

Guess who had some hazelnuts left over from the last recipe? I thought I was going to be stuck forever with about 1/3 cup hazelnuts, destined to sit in my pantry for all time. But, yet again, Yotam came to my rescue. Why didn't I think of adding hazelnuts to salads before? So easy! So delicious! Such a great way to use up a pointlessly small amount of hazelnuts!!

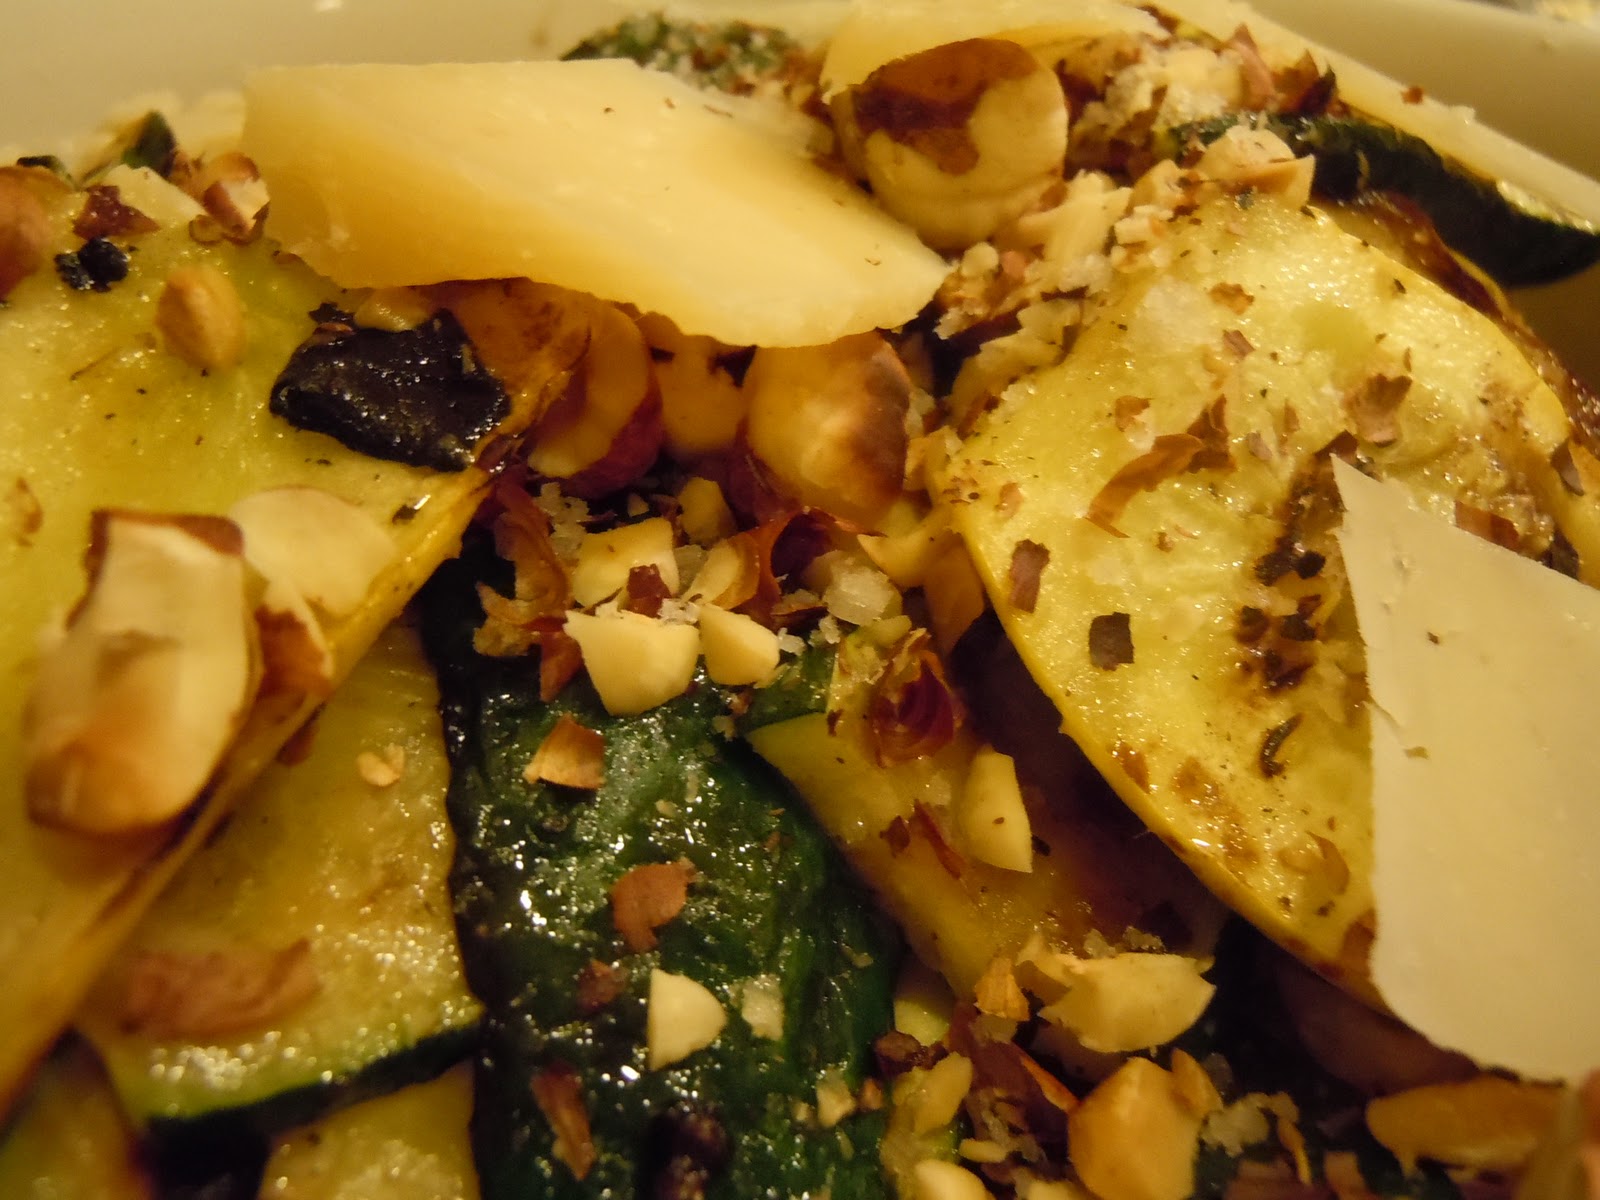
And it was delicious. I rarely serve zucchini in a salad-type setting, but I'm going to have to do it more. And the recipe also gave me a chance to use my oft-neglected griddle pan, allowing me to make those lovely little charred marks on each zucchini slice. Adding a touch of class to the whole dish.

Serves 4

Ingredients
1/3 cup toasted hazelnuts
7 small zucchini (1 3/4 lbs in total)
4 tbsp olive oil
salt and black pepper
1 tsp balsamic vinegar
1 1/4 cups greens (e.g. lettuce, spinach, etc.)
small handful of basil leaves, torn
3 oz Parmesan, broken up or thinly sliced
Optional: 2 tsp hazelnut oil (if you happen to be one of the 5 people in the world who have this on hand)

Method
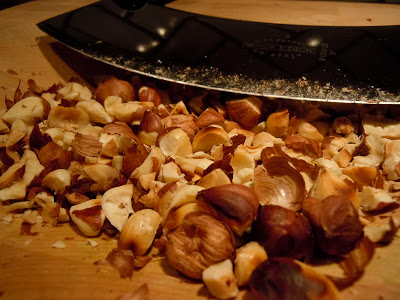
For toasting the hazelnuts: Preheat the oven to 300 F. Scatter the hazelnuts over a baking sheet and roast for 12-15 minutes, or until nicely browned. Let them cool down before chopping roughly or just crushing lightly with a large knife.

For the salad: Place a ridged griddle pan on a high heat and leave it there until it's almost red-hot, at least 5 minutes.

Meanwhile, trim the ends of the zucchini and cut them on an angle into 1/4 inch slices. Place them in a bowl and toss with half the olive oil and some salt and pepper. Place the slices in the hot grill pan and char-grill for about 2 minutes each side; turn them over using tongs. You want to get distinct char marks without cooking the zucchini through. Transfer to a mixing bowl, pour over the balsamic vinegar, toss together, and set aside.

Once the zucchini have cooled down, add the remaining olive oil, the basil, greens, and hazelnuts. Mix lightly, then taste and adjust the seasoning accordingly. Transfer the salad to a flat place, incorporating the Parmesan, and (if you're using it), drizzle over the hazelnut oil.

Pear-Hazelnut Quick Bread

Who doesn't love quick bread? It's bread. More quickly. My mother has been lusting after this flavor combination for some time (don't ask me about a certain pear-hazelnut cake that I have promised to make her), but this quick bread was able to mollify her for the time being.

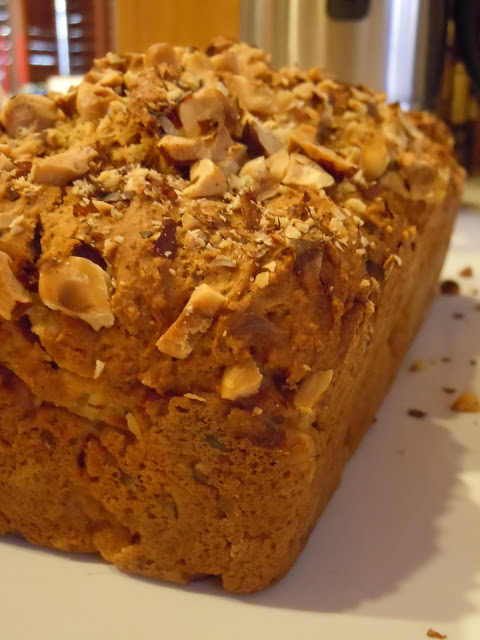
It's ridiculously simple and open to plenty of variation. Being the lazy cook I am, I refused to peel the hazelnuts, even after I toasted them. I don't think it took a thing away from the overall bread. If anything, I think it made it nice and "earthy".

The hazelnuts on top are also a good touch, both for eating and viewing purposes.

Makes either one large loaf or 12 muffins

Ingredients
1 1/2 cups whole-wheat pastry flour (or whole-wheat flour)
1 cup all purpose (plain) flour
1 1/2 tsp baking powder
1 tsp ground cinnamon
1 tsp ground ginger
1/2 tsp baking soda
1/4 tsp salt
1/2 tsp ground allspice
2 large eggs
1 cup nonfat/lowfat buttermilk
2/3 cup brown sugar
2 tbsp butter, melted
2 tbsp canola oil
1 tsp vanilla extract
2 cups diced peeled pears (about 2)
1/2 cup chopped toasted hazelnuts, plus more for topping

Method

Preheat oven to 400 F for muffins and 375 F for a large loaf. Coat pan with cooking spray.

Combine the first eight ingredients in a large bowl.

In a medium bowl, whisk eggs, buttermilk, brown sugar, butter, oil, and vanilla.

Add the wet ingredients to the dry ingredients bit by bit, stirring until just combined. Add pears and hazelnuts. Stir until just combined (don't overmix).

Transfer batter to the prepared pan. Top with additional hazelnuts, if desired.

Bake until golden brown, until a wooden skewer inserted into the center comes out clean, 22-25 minutes for muffins, about 1 hour for the large loaf. Let cool in the tin (15 minutes for muffins, 45 minutes for a loaf) before turning out onto a wire rack.